Monday, August 12, 2013

Beach Vacay Dos*

It's been too long... I know. I've been having more fun reading blogs than writing my own. But I have a new post that adds to our first beach vacay. A year ago when we went on our first family vacation I came up with the idea of making a souvenir apothecary village. I loved it then and now that I got to add another I'm loving it even more!

 This year we went to Port Aransas and Corpus Christi. We stayed in Port Aransas and went to Corpus for the Texas State Aquarium and the USS Lexington Museum. I used to go to Port A when I was younger with my parents so it was fun going with the kiddos and getting to share my memories with them.

After a day at the beach in Port A I found out that there were barely any shells... at all. I was kinda bummed and then when we went to Corpus it looked like there was broken glass all over the beach from all the shells. We didn't get in the water in Corpus because there were signs everywhere warning about jellyfish. I didn't want to deal with that. I did explain to my son what you're suppose to do if you get stung by a jellyfish... My 8 year old little man thought it was very amusing. Does it make me a bad mom if I'm telling my son to pee on someone if they get stung by a jellyfish? 

Back to the task at hand

I found my apothecary jar at Michaels again. It's bigger so it cost more than the last one -$30- BUT I donated a dollar to a school supplies fund and got a 40% off coupon so it came in around $21. 
I added the sand and shells we collected and ended up with this.


Last time I added a date card inside the jar


This time I decided to make a tag to hang around the lid. So I got on the mean machine and came up with this

And drumroll please


and here are our two souvenirs together looking pretty on our mantle


Vacations are becoming a special thing now and we're already planning our trip for next year.
We are thinking South Padre, Texas 2014. Then we will have a trio! 

I hope everyone had a great summer! 

LoveYa!!!


Tuesday, March 5, 2013

New Chandelier & DIY Rope Light Chain Cover

The other day the Hubby and I were browsing Lowes. I honestly don't even remember what we were there for because I found this chandelier.


It was $39.98! Sadly there were none left. Sad day... When we got home I looked it up on the 
mean machine-
yes that's a Fifty Shades of Grey reference...

On the Lowes website it's $79.96. Obviously there was no chance of ordering it online when it was half the price in store - I started to wonder if it was a typo at the store. I saw that another store had it in stock so the next day while the kids were at school we went straight there. They had one, it was $39.98 and it automatically went into my cart. The hubby thought it was pretty funny how determined I was - nobody else was going to get my chandelier! 
A month ago I saw this post from The Lettered Cottage about their chandelier in their sunroom. Instead of hanging it by the chain they used a rope covered chandelier pole that they got from their friend for $20.  


I think it looks so beautiful and rustic and I want it!


Of course I didn't want to pay $50 for it so I started to think of a way to make it myself. All it took was some pvc pipe, black spray paint, hot glue and manila rope. 

***********************

First we figured out how long the chain was going to hang from the ceiling. We measured it out to be 20 1/4" and cut the pvc pipe that length. I took some black spray paint and sprayed the ends so that you wouldn't see any white. 


Kinda a bad picture but you get the idea. After that it was just hot glue and wrapping - a lot like my Jute Christmas Ornament. The rope I used was pretty thick - 1/4" and when I first started wrapping I had to hold it down until it dried otherwise it would't stick. After I was done wrapping we just put the pipe over the chain and hung it up.


We went from this


to this


for around $55! One of the bulbs didn't work and we haven't gone to get more so yes it's one short in this picture. But it doesn't matter - I absolutely LOVE it!!! I can't stop looking at it. Now go wrap something with rope it's amazing!!! Seriously it's addicting next I'll show you how to wrap your children or some lamps whichever works best...

I hope everyone is having a good week!

LoveYa


Friday, February 8, 2013

Pallet Art

For the past few weeks we have been going through a bathroom renovation. I'm pretty excited about it because it's all starting to come together. I'm trying to make it feel vintage/rustic/spa -ish... We will see if I hit the nail on the head. But for now I'm going to share how I'm bringing in a little rustic with some DIY Pallet Art.

I have had a pallet for a while just waiting for something AMAZING to be done with it. I had tossed around some ideas and finally found the right thing for the Ayres. The first thing I did was print out a picture that I liked and used a projector to project an image on my pallet.


I had to find a dark place to do it and the bathroom was the best place. Then after I had traced it out I had this cute little puppy.


I decided I wanted to stain the outside and leave the inside natural but to get to that point I needed to get it ready. I taped off the silhouette and then for added protection from stain seepage I scored the edge of it with a razor blade.


Now it's time for the stain. I used Minwax Early American stain and just followed the directions on the back of the can. When it was dry I pulled off the tape and found out that it was a little messy. I had read online that the stain would probably seep through so I was prepared for it but in all honesty it's a pallet it's not a million dollar canvas so a little messy was fine with me. We tried to clean it up a little bit by sanding it and worked perfectly! So don't ever get discouraged and just keep working with it.


This pallet is going in our bathroom so to protect it from moisture I did four coats of minwax polyurethane. I let it set for a few days mostly because we were still doing a lot in the bathroom but tonight we finally got it up on the wall. And here she is!


I really love how it turned out. I love the colors of the wood against the white walls. I love it!!!
Hopefully soon I'll be able to post my first room reveal - pretty exciting!
I hope y'all had a great week! Our little boy turned 8 on thursday and his party is on Sunday so I know I'll be having a fun weekend and I hope y'all do too!!!

LoveYa

Thursday, December 6, 2012

It's that time of year!

I want to start off this post by saying

!!!I LOVE CHRISTMAS!!! 

Seriously!!! I love looking at everyone's christmas decorations, the cooler weather, the food and presents of course! Love it!!! I don't decorate for other holidays just christmas. Now I've never really been able to seriously decorate for christmas because we could just never afford to go get a tree or buy a ton of ornaments or any other little christmas vignettes around our house -- mostly because I hadn't found my true crafty mojo yet. I know you can make a beautiful christmas for cheap but I just didn't understand how to do it.  But this year we finally bought a tree! So exciting!!! We got it from hobby lobby and it's beautiful!!!

Here's my little man showing it off!

If you didn't notice there are two lonely ornaments on it in the picture. I had those laying around because I made them! Go me!!! I was inspired by Pinterest -- yea I know who isn't? -- and decided to make some of my own. If you like rustic textured ornaments then you'll like the one I'm going to show you today!

                                 DIY Jute Christmas Ornament                                     

Supplies: 
Styrofoam ball
Jute String 
Glue Gun
Glue Sticks
Scissors

 The first thing you do is cut 6 1/2 in. of jute and set aside -- this will be for the loop to hang from the tree. Next take your jute and glue the end to your styrofoam ball.


Then add a dab of glue and fold the jute on itself to start wrapping it around the ball. Then you add strands of glue as you wrap the jute around. 


It was kinda therapeutic wrapping the jute around and I forgot to take pictures of most of the progress but you get the idea -- you wrap and wrap. 


*As you can see in the picture I glued the loop on the ball. Now I had originally glued the loop on first but when I started wrapping the jute around the ball I realized it wasn't center so I ripped it off and re-glued it. It's totally up to you but I think it's easier to wrap the ball first and when you get to the top (the section in the pic above) I would add your loop. 

Once you've gotten closer to top take the 6 1/2 in. of jute you set aside earlier and glue it centered on the very top of the ball. Then guess what... you continue wrapping your ball. As you get closer to the loop hold the loop up and continue wrapping to make sure your loop will be centered and hang straight.  When you've covered everything up to the loop cut the jute, finish wrapping and glue in place.


Ta-Daa!!!
You have a beautiful rustic ornament!


Hope you like it, I know I do!!! Now I need to get to work on my other DIY ornament! 

LoveYA


Wednesday, November 21, 2012

Vampires, Werewolves and Young House Love!!!

Last weekend we had an adult weekend! I had everything planned to the T and thanks to my mommy and daddy who took our little guys for weekend everything went perfectly!!!

Friday the hubs and I drove half way to Abilene to to meet my dad to hand over the kiddos. We then high tailed it back to Arlington to have our dinner date. We went to our normal spot BJs -- SO GOOD! After dinner we had a little time to relax ( I don't know how you are but I HATE waiting so not so much relaxing for me). Then we picked up my friend Krimson and our sister in law Maura to go see Breaking Dawn 2.


Yes I am a Twi-Hard.... I guess... I honestly don't even know if that's how you spell it. I've read the books and have seen all of the movies. I don't have posters or anything. But anyway the movie was AMAZING!!! The "twist" definitely almost gave me a heart attack. Me and Maura kept looking at each other in shock. I was so happy it ended exactly the way it did in the book. Such a good movie! I want to go see it again! Yes I'm one of those... 


We got home movie around 1am after dropping everyone off and probably went to sleep around 1:30am. I wanted to wake up early the next morning because we were going to go meet Sherry and John Petersik from young house love! I can not begin to tell you how excited I was! I wanted to get there extra early because I knew there would be a line but because we were up so late the night before it didn't happen. We ended up getting there around 10am after a pit stop at Chik Fil A for the hubby. He didn't understand that I wasn't the only person in the dfw area that read their blog. When we got there he was like "the lines not that bad" and after a couple of minutes he realized it went around the building. Yea... It wasn't a big deal though we actually met some sweet ladies in line from Louisiana. We had a lot of fun waiting and talking and chowing down on some young house love inspired cookies and yummy cocoa. 


I started to get a little stalkerish and crazy when I saw John inside. And of course I have some stalkerish pics for you.

 John Petersik
Sherry and John Petersik with a random person
In case you didn't know "stalkerish pics" = blurry/horrible pics...

As we got closer I started to get nervous about what I'd say. Seriously?!?! Yes... don't ask me why. It took awhile to go through the whole line. Once we were inside people started sitting on the furniture including my hubby who sat down at a table and took a cat nap. hehe...


Finally it was our turn!!! I had my book and camera ready. I thought it was funny that Sherry kept saying "Come on down!" to the next person in line. When I walked up I couldn't stop smiling -- even Sherry said I was all smiles. All I thought was yea I'm meeting yall!!!  She asked if I was Holly which I told her yes. She said it was a very beautiful name and that they almost had a Holly (meaning their adorable daughter Clara) and then Sherry said but John had an ex named Holly so that couldn't happen... Hmmm... So does she really like the name? Was it a situation where she was pregnant thinking about names and was like I like Holly and John was like Yea about that... HAHA I thought it was pretty funny and said yea that could be a problem. I told them Clara was beautiful and they gushed about how they got to see her that night. Too Cute! We then got our picture with them and it was time to be on our way. I wish I could've just sat and talked the whole time. They were so sweet!


Seriously the cutest couple ever!!!


There's my signed copy!!!

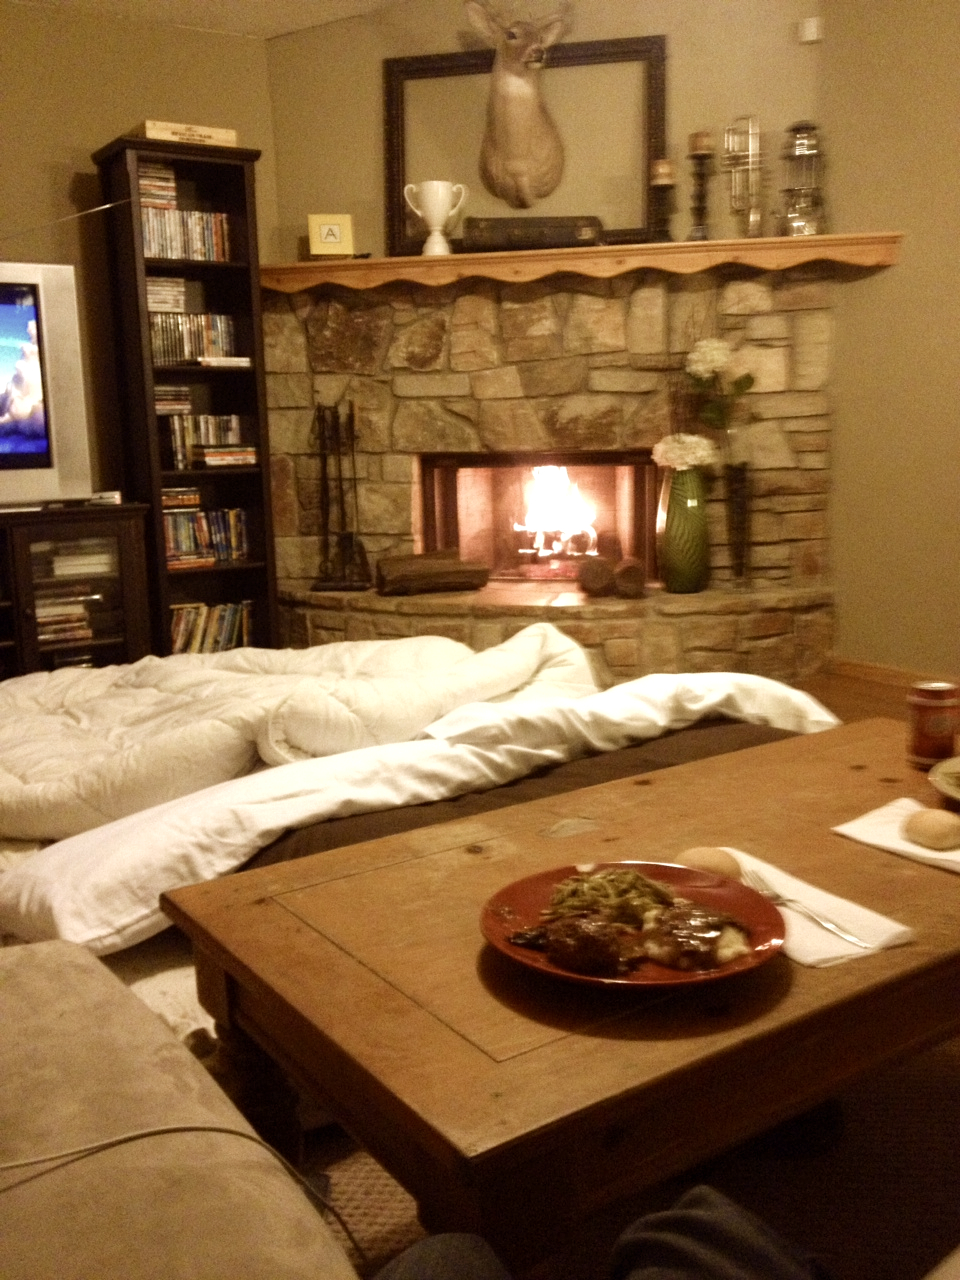
 But we had to get back to our weekend! I had decided that since Friday we had a night out Saturday we would have a night in. So for dinner I made Salisbury Steak, something hubs was just introduced to by my mommy a couple of weeks earlier. We got out our new air mattress and started a fire in the living room for an adult camp out. We had dinner and watched Total Recall and Wrath of the Titans. 


Since we had such a long day we crashed early in front of the fire with I Love Lucy playing in the background. ( I fall asleep to Lucy)

It was the perfect weekend with my hubby!!! Hope yall had a great weekend too! And have a Happy Thanksgiving!!!

BTW you should definitely check out Sherry and John at younghouselove.com!!!

Signing off as your vitameatavegamin girl!

LoveYA 

Sunday, October 21, 2012

Disney Princess Silhouettes

Well the weekend is over and the cowboys won FINALLY!!! Sometimes it's just depressing to watch them... I didn't get to watch the whole game because I had a baby shower to go to for my friend Kary. Kary is having a girl and is naming her Aurora -- yes after Sleeping Beauty. I love this name, I used to want to name my child this but both the hubby and my mommy said no and I wasn't in the mood to argue. But being that she's named after a Disney princess her nursery took on that theme. I had seen these silhouettes on Pinterest a while back and thought they'd be the perfect starting point for a gift.


I asked Kary who her three favorite disney princesses were and she chose Aurora (obviously), Belle, and Ariel. After looking around on the internet I found some really CUTE silhouettes from Isabel Talsma. This girl has all the different Disney princesses, princes and different movie characters including Jack and Sally from Nightmare before Christmas!!! I LOVE that movie!!! BONUS!!!


First, I cut them out


Then I traced them onto some scrapbook paper


I did some more cutting


And then I put them in some frames


Aren't they so cute and sophisticated? 

I don't know about you but I feel like certain theme rooms can get a little cheesy but I think this would be such a cute way to bring in a theme without the cheese. It makes me want to have a little disney princess room.

I must say I'm pretty proud of this project. It was easy, it turned out amazingly cute and only cost me $11. The frames were at Michaels on sale for a total of $8 and the paper made up the rest. 

***Make sure you check out Isabel's other designs by going to her Etsy shop HERE or her website HERE!!!

Thanks for stopping by!!!

LoveYa

Friday, October 5, 2012

Cookies & Cream Double Chocolate Cake Bars

Can you say YUM???

These were so good!!! Yes I know another dessert... I have a sweet tooth what can I say? The preparation was a lot like the Gooey Butter Cake I made -- easy peasy! I actually made these awhile back and never got around to blogging about it so I'm sneaking it in just in time for the weekend.


 I'm gonna keep this simple & definitely SWEET!!!

_________________________________________________________________________________

Cookies & Cream Double Chocolate Cake Bars

1 Devils Food Cake Mix
8 Tbs. (1 stick) unsalted butter, softened
1 Large egg
1 1/2 cups chocolate chips
14 oz. can sweetened condensed milk
14 Oreo cookies, broken into bite size pieces 

1. Preheat oven to 350 degrees F and line a 9x13 baking pan with     tin foil sprayed with non-stick cooking spray
2. Place cake mix, butter and egg into a large bowl, mixing to combine. Press into prepared baking pan and top with broken pieces of cookies.
3. Pour sweetened condensed milk over cookies and top with chocolate chips. Bake for 23-25 minutes, until cooked through. Remove from oven.
_________________________________________________________________

I hope y'all enjoy and have a great weekend!!!

LoveYa